DIY Beach Shelter
- February 24, 2024
- 7:23 pm
We needed some kind of beach shelter that was easy to transport and quick to put up. I googled around at a few designs and of course, being a sewist, decided I could just make something myself.
I shared this on Instagram and had requests for instructions so here we go: this article is all about the DIY Beach Shelter and how I made it.
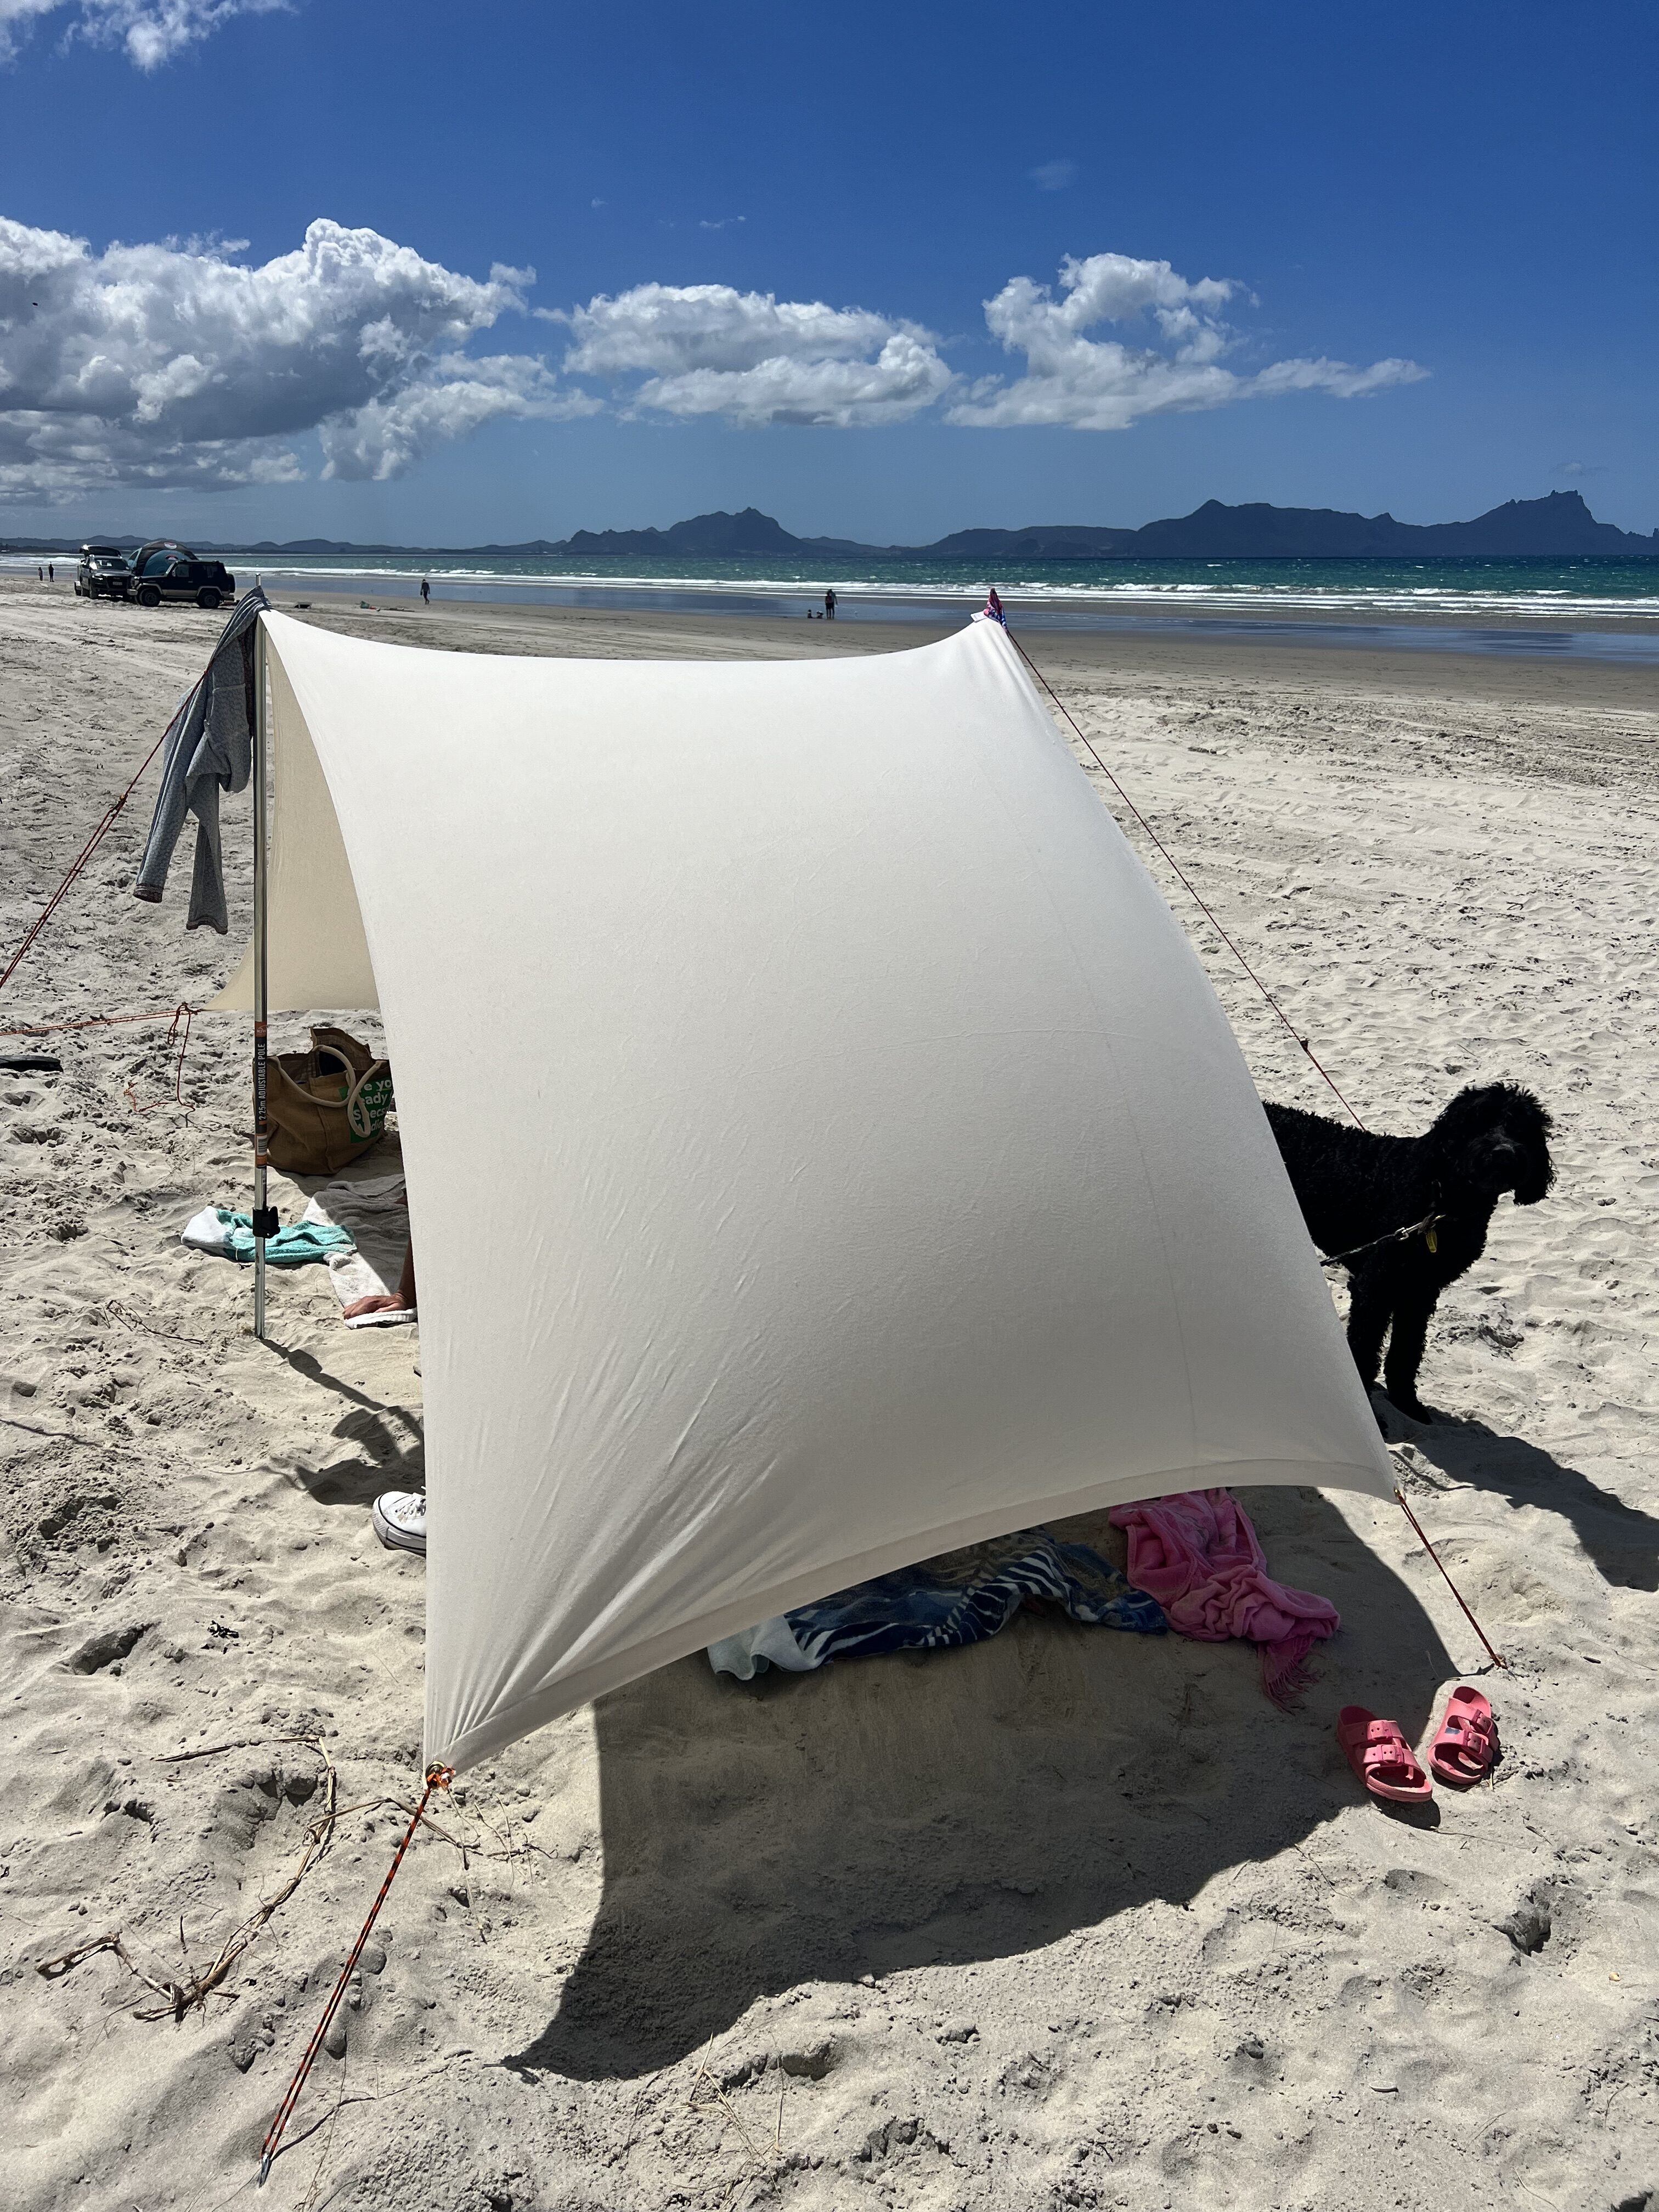
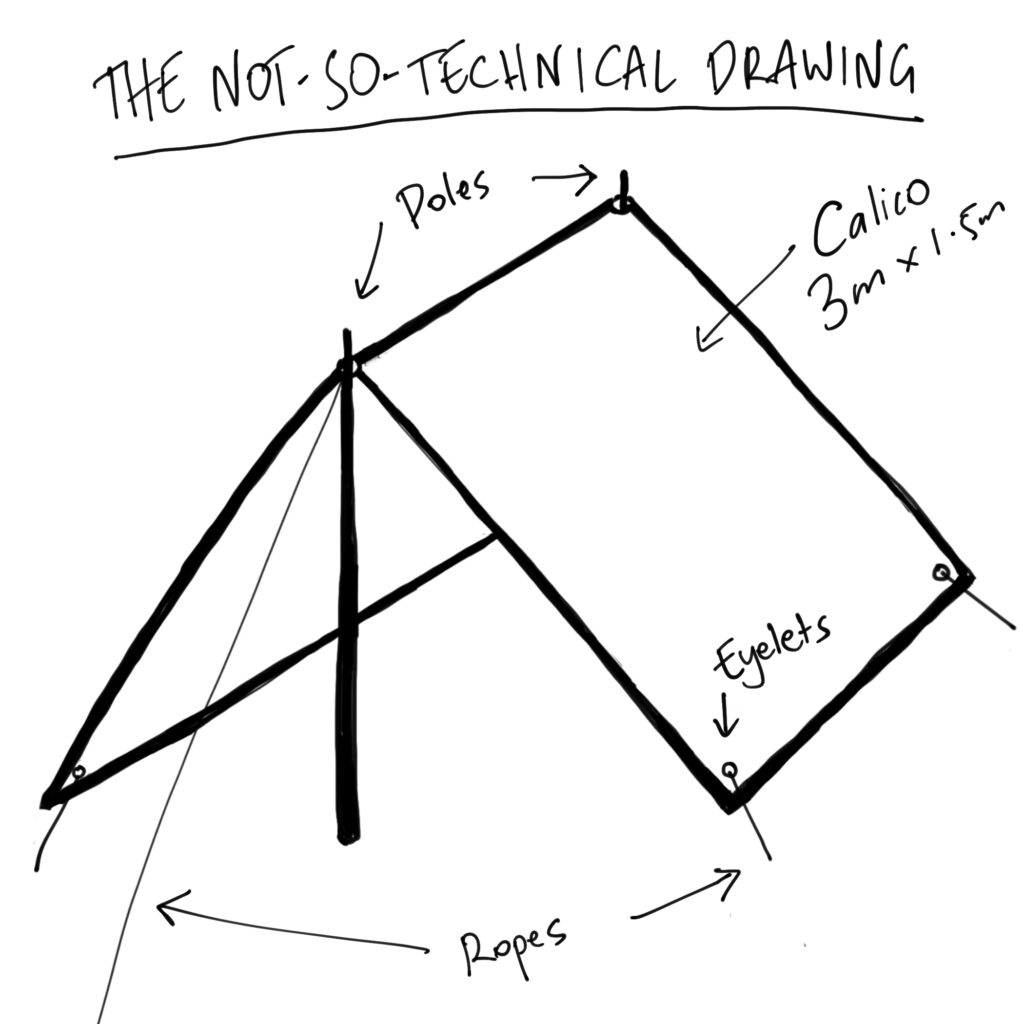
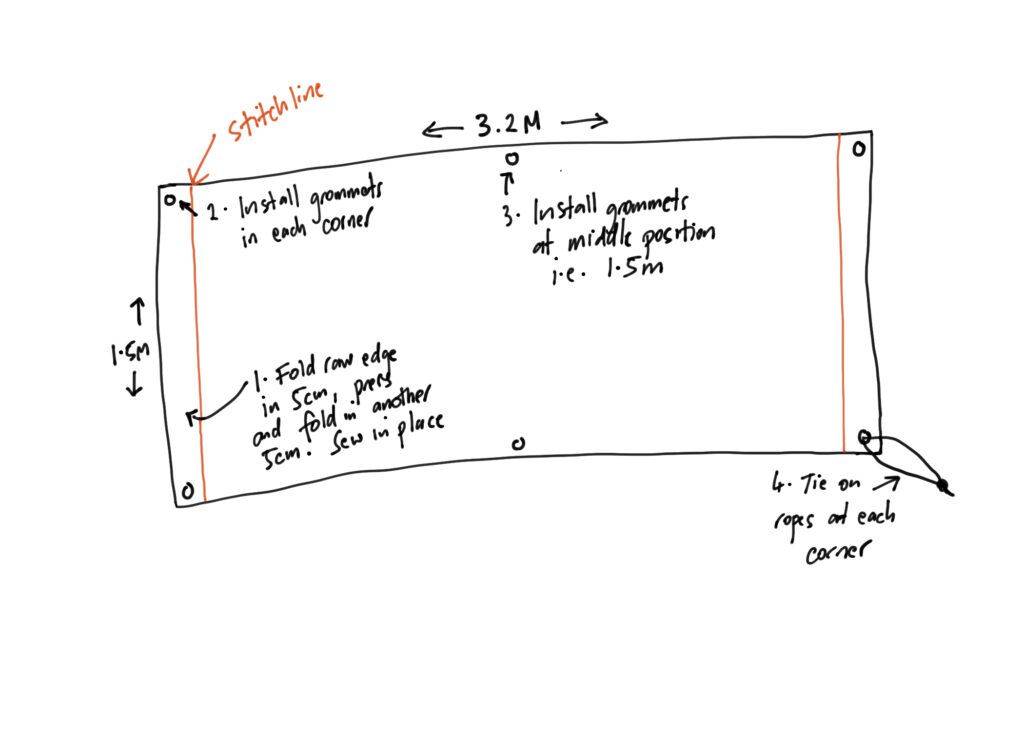
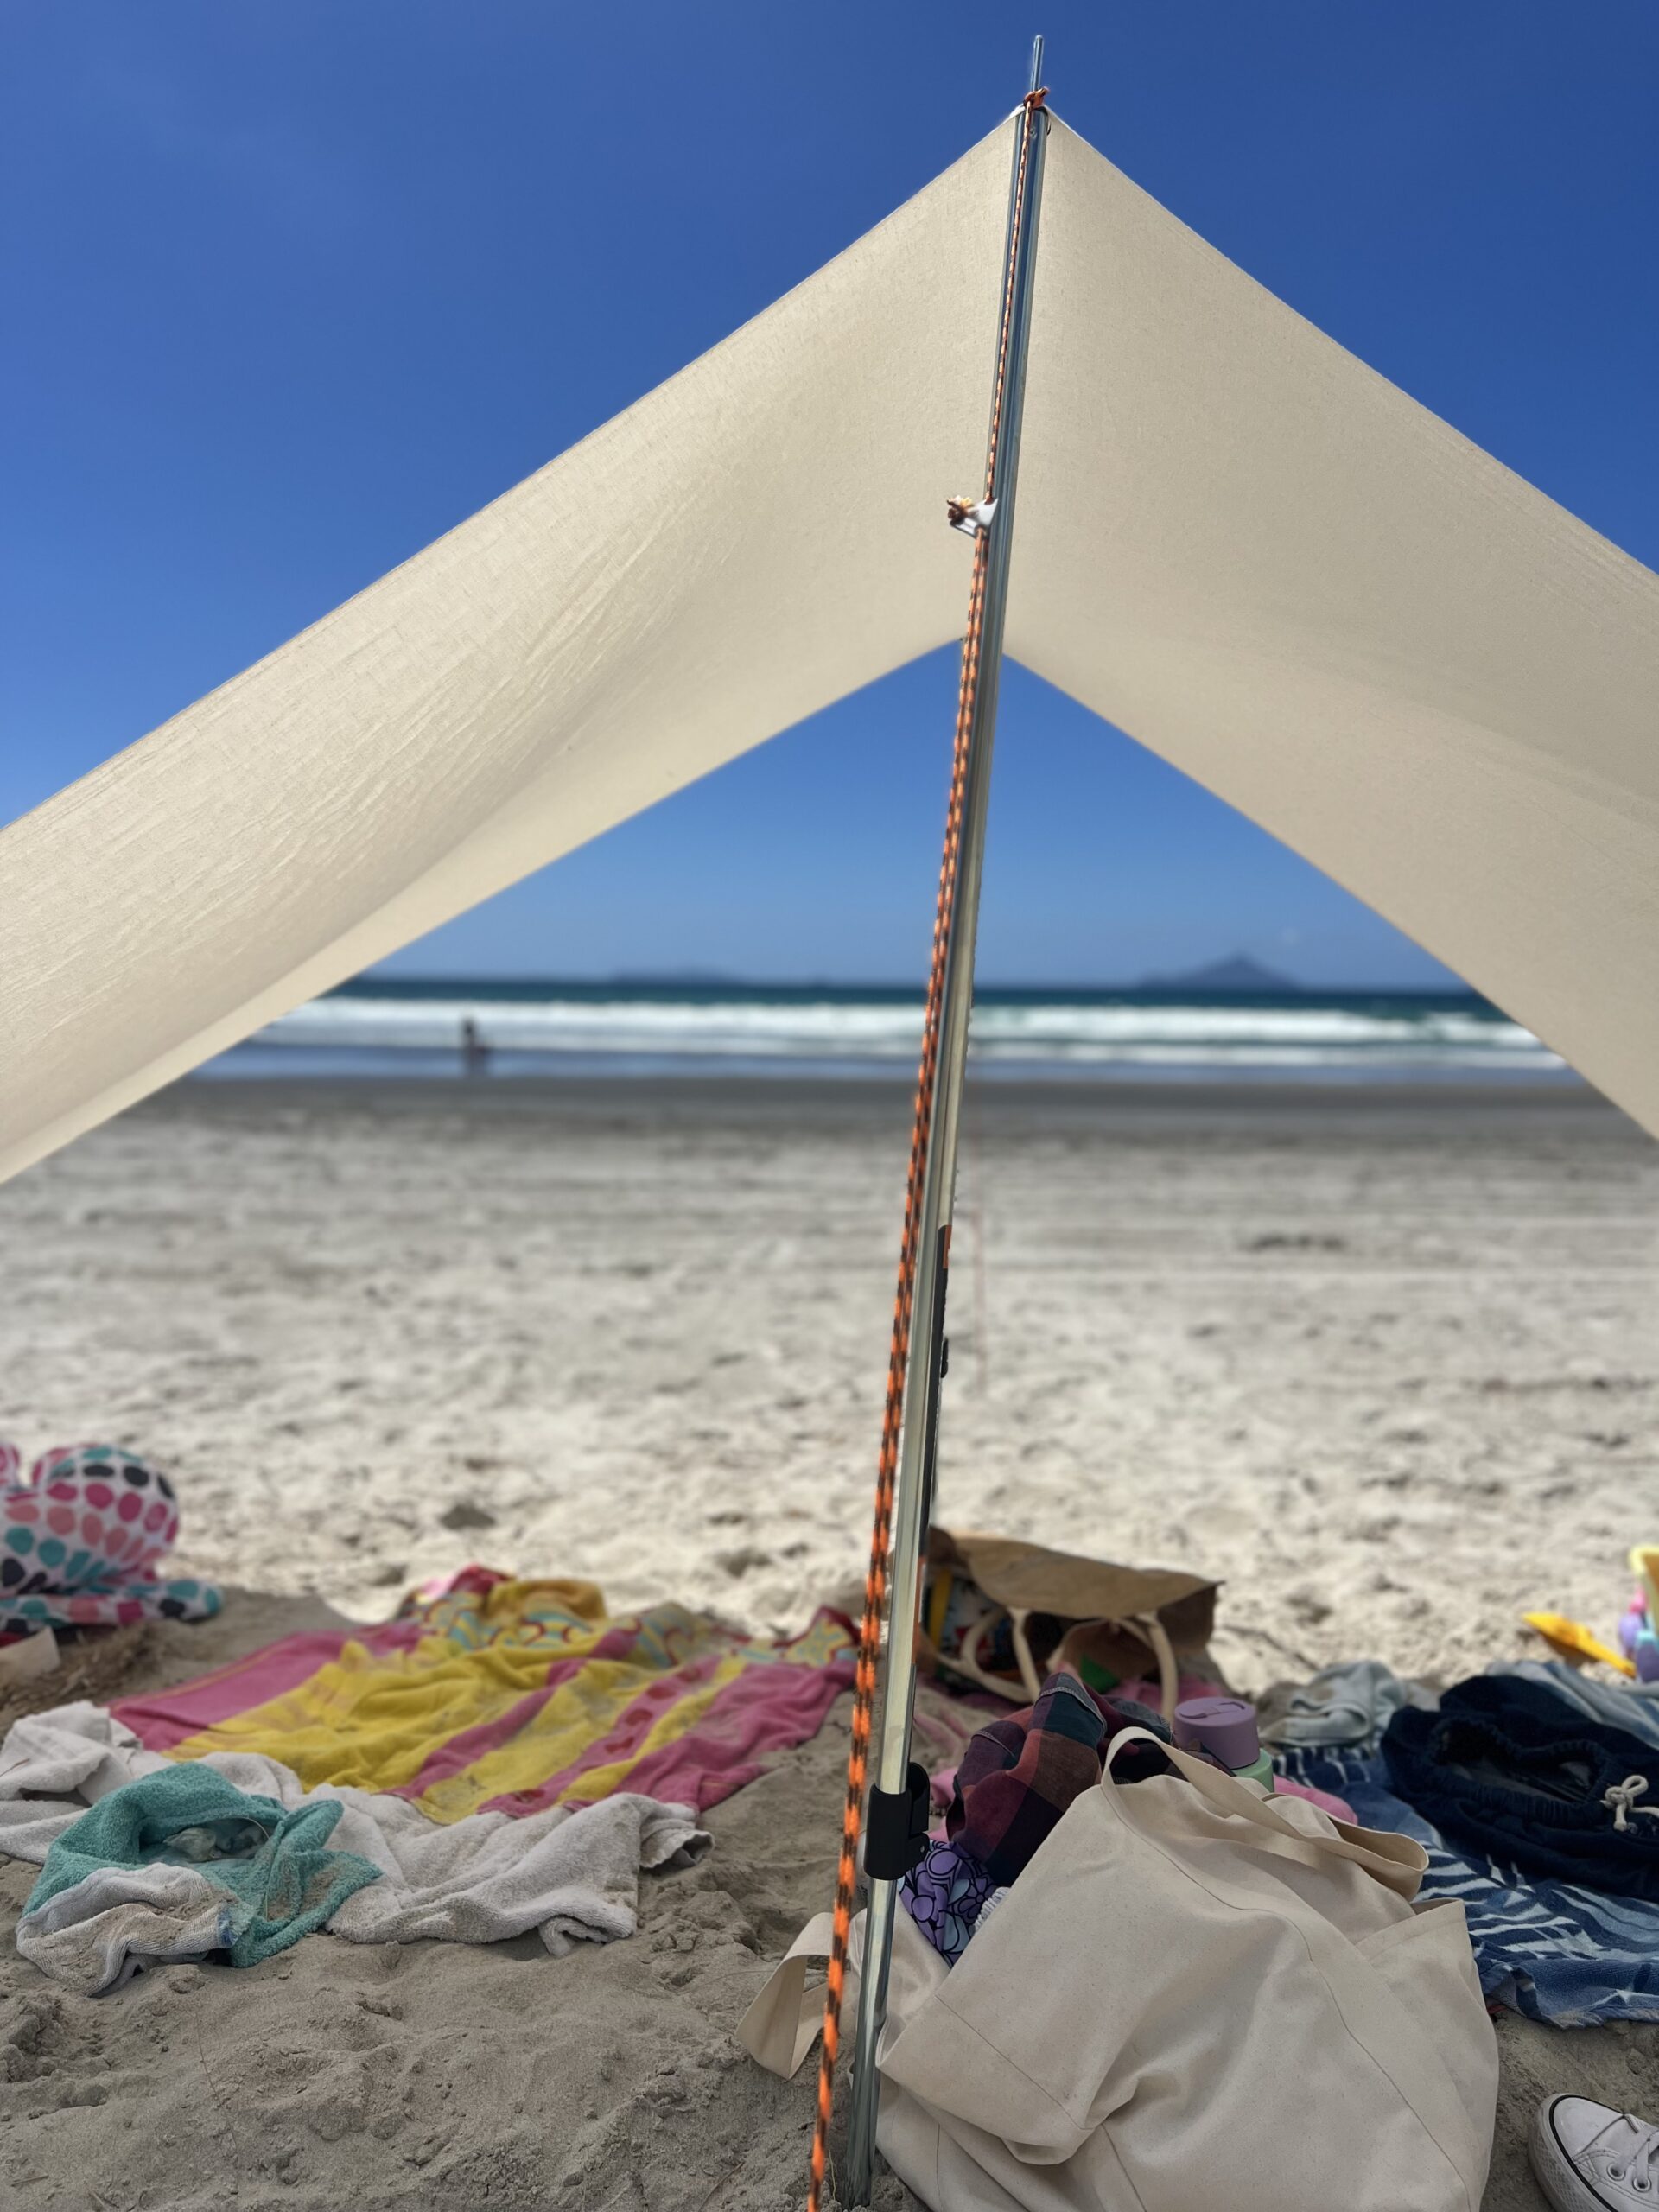
I design I choose was a classic A-frame tent style shelter with 2 poles, guy ropes and pegs. It’s usually pretty windy on our favourite beach so it was important it would hold up on gusty days, so I thought this pegged in style with options to set up in different configurations would suit us.
The shelter uses approx 3.2m of calico fabric, this could be adjusted easily depending on how much fabric you have of if you want to make it bigger/smaller. Ours fit three towels across for 2 adults, 1 kid, and our 2 dogs even got in there with us!
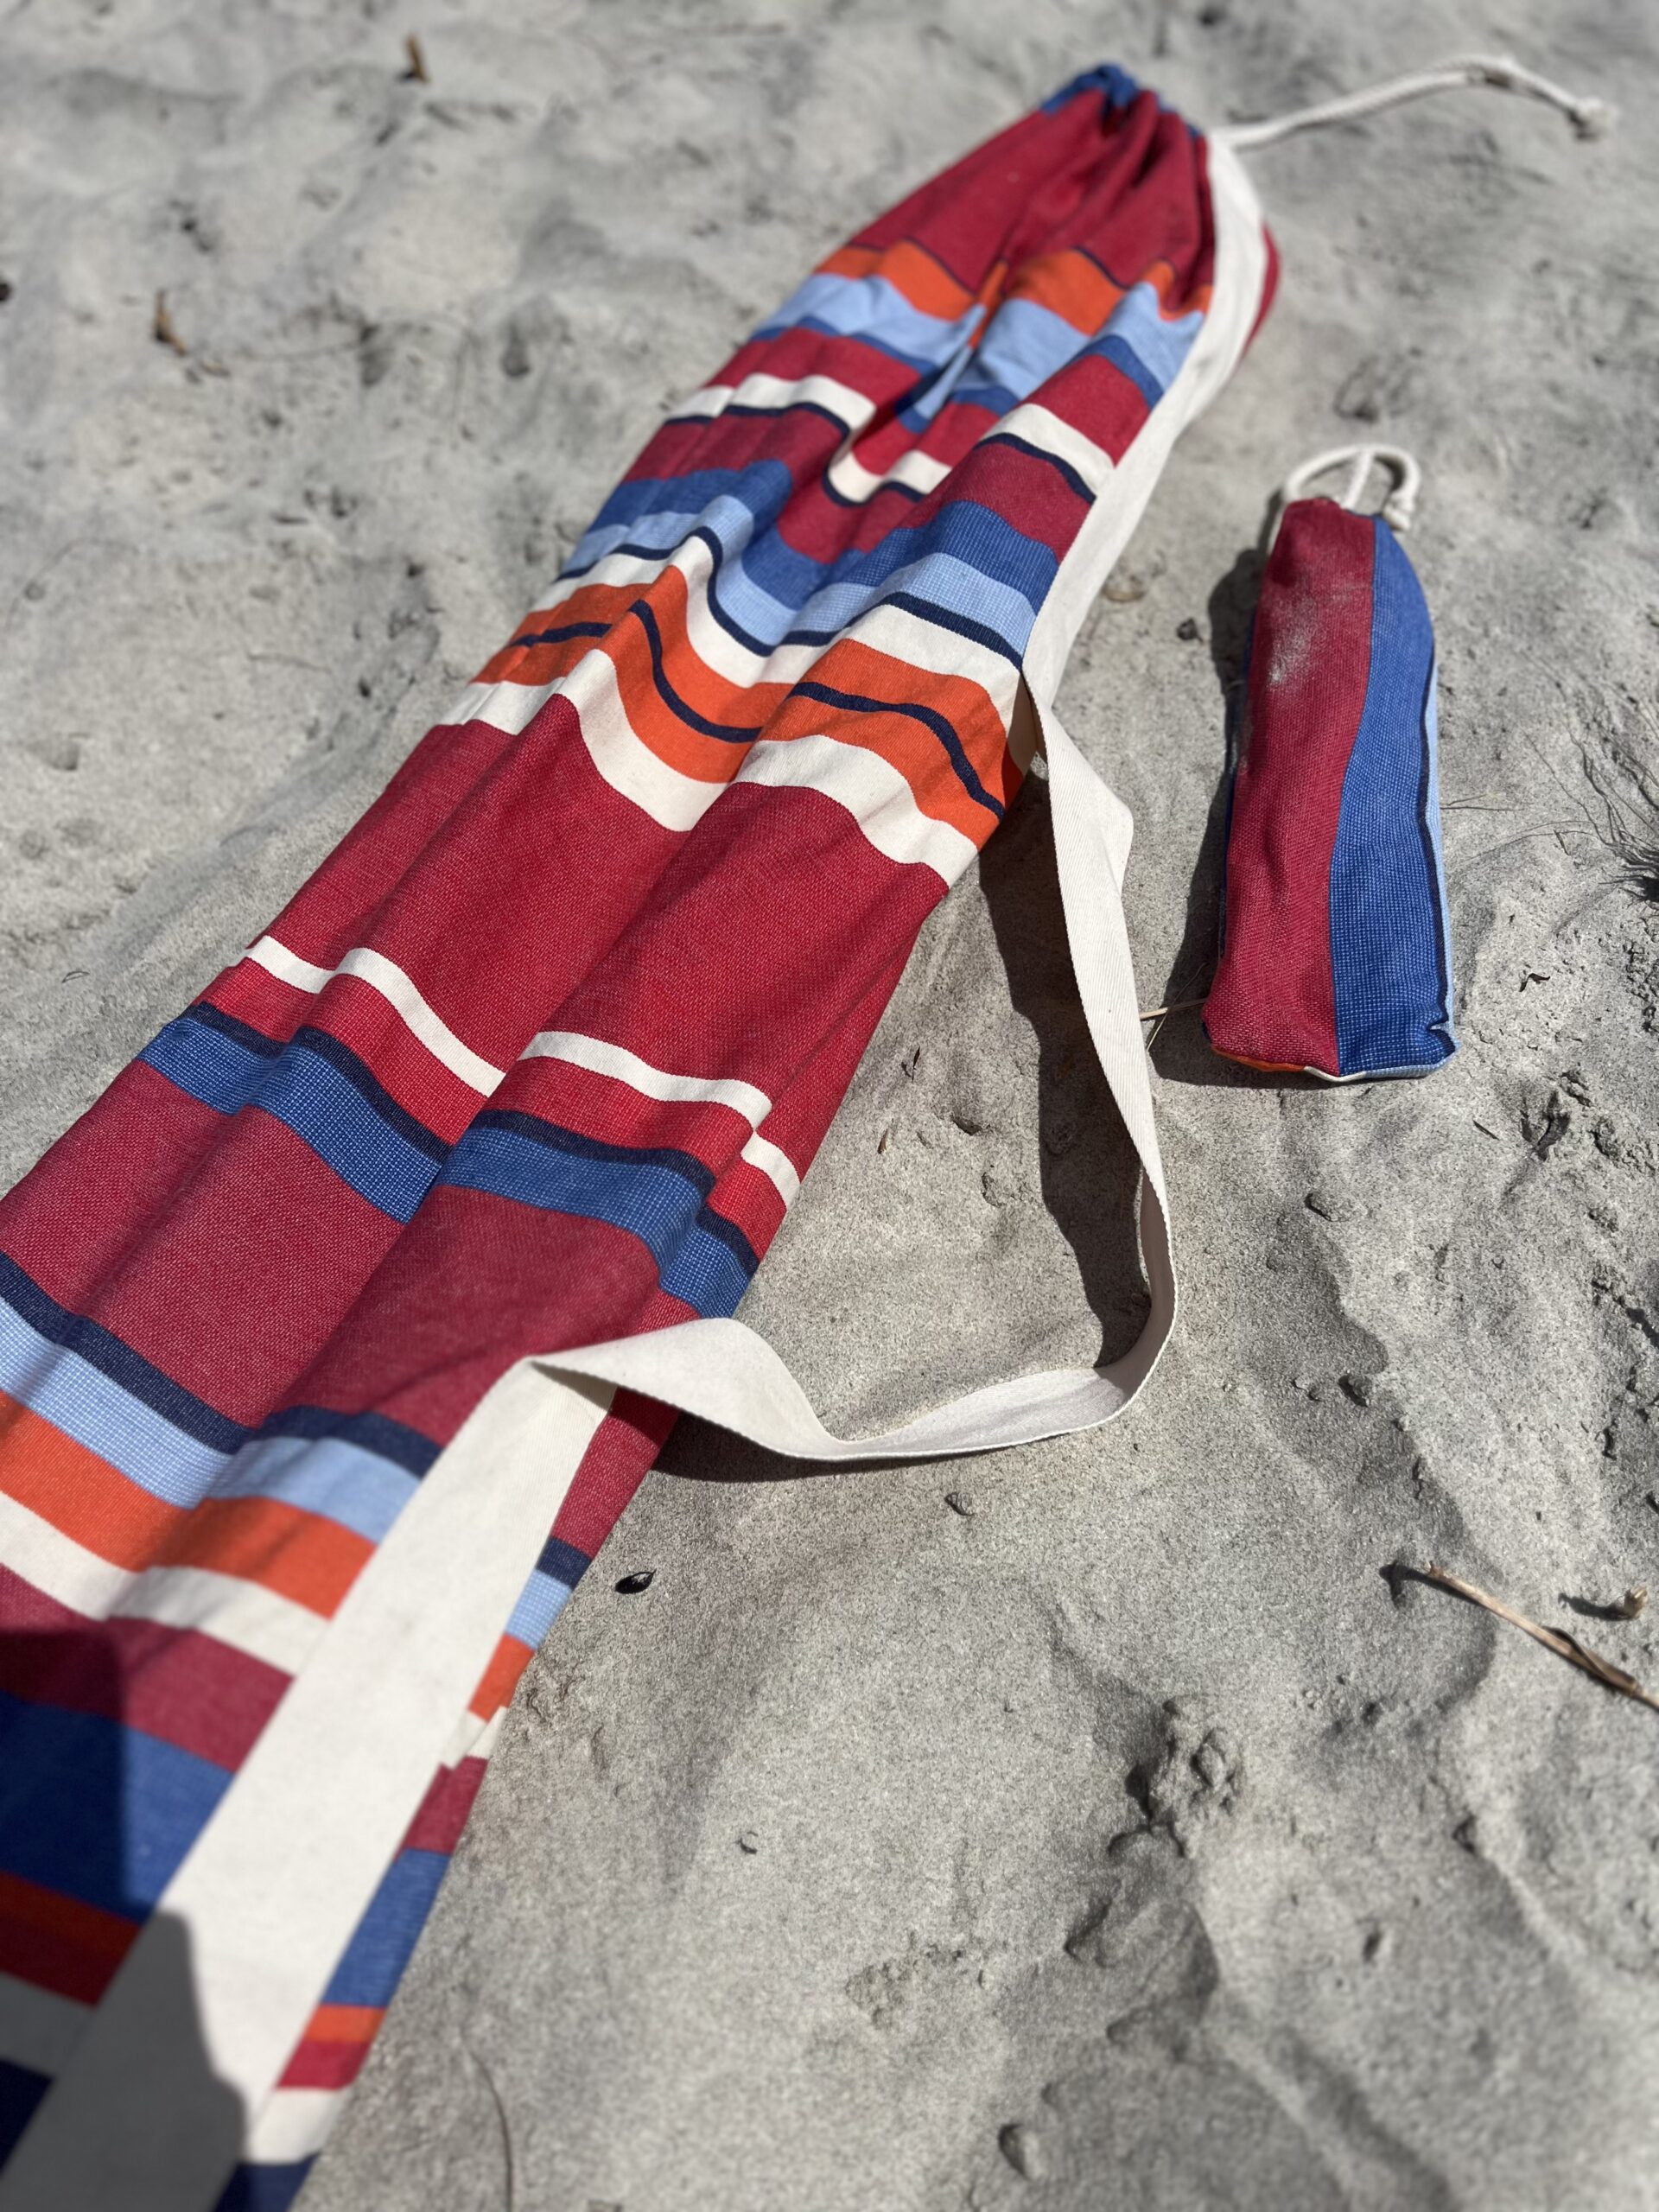
I also had some neat vintage canvas tucked away so I whippped up a quick storage and matching peg bag. I’ve popped the instructions for this below too.
Disclaimer: I am not a master pattern on instruction writer so feel free to shoot me an email or DM if something isn’t clear.
Materials
Here is what you’ll need to make the beach shelter and storage bag. I mostly used things from my store as that’s what I had handy (you might have different things!) and grabbed the rest from my local Hammer Hardware. Again I chose to use Calico for the main fabric as I had some in stock but of course you can sub this out for anything you like.
Shelter:
- 3.2m of Pre-washed Cotton Calico (150cm wide)
- 2 x adjustable tent poles (something like this)
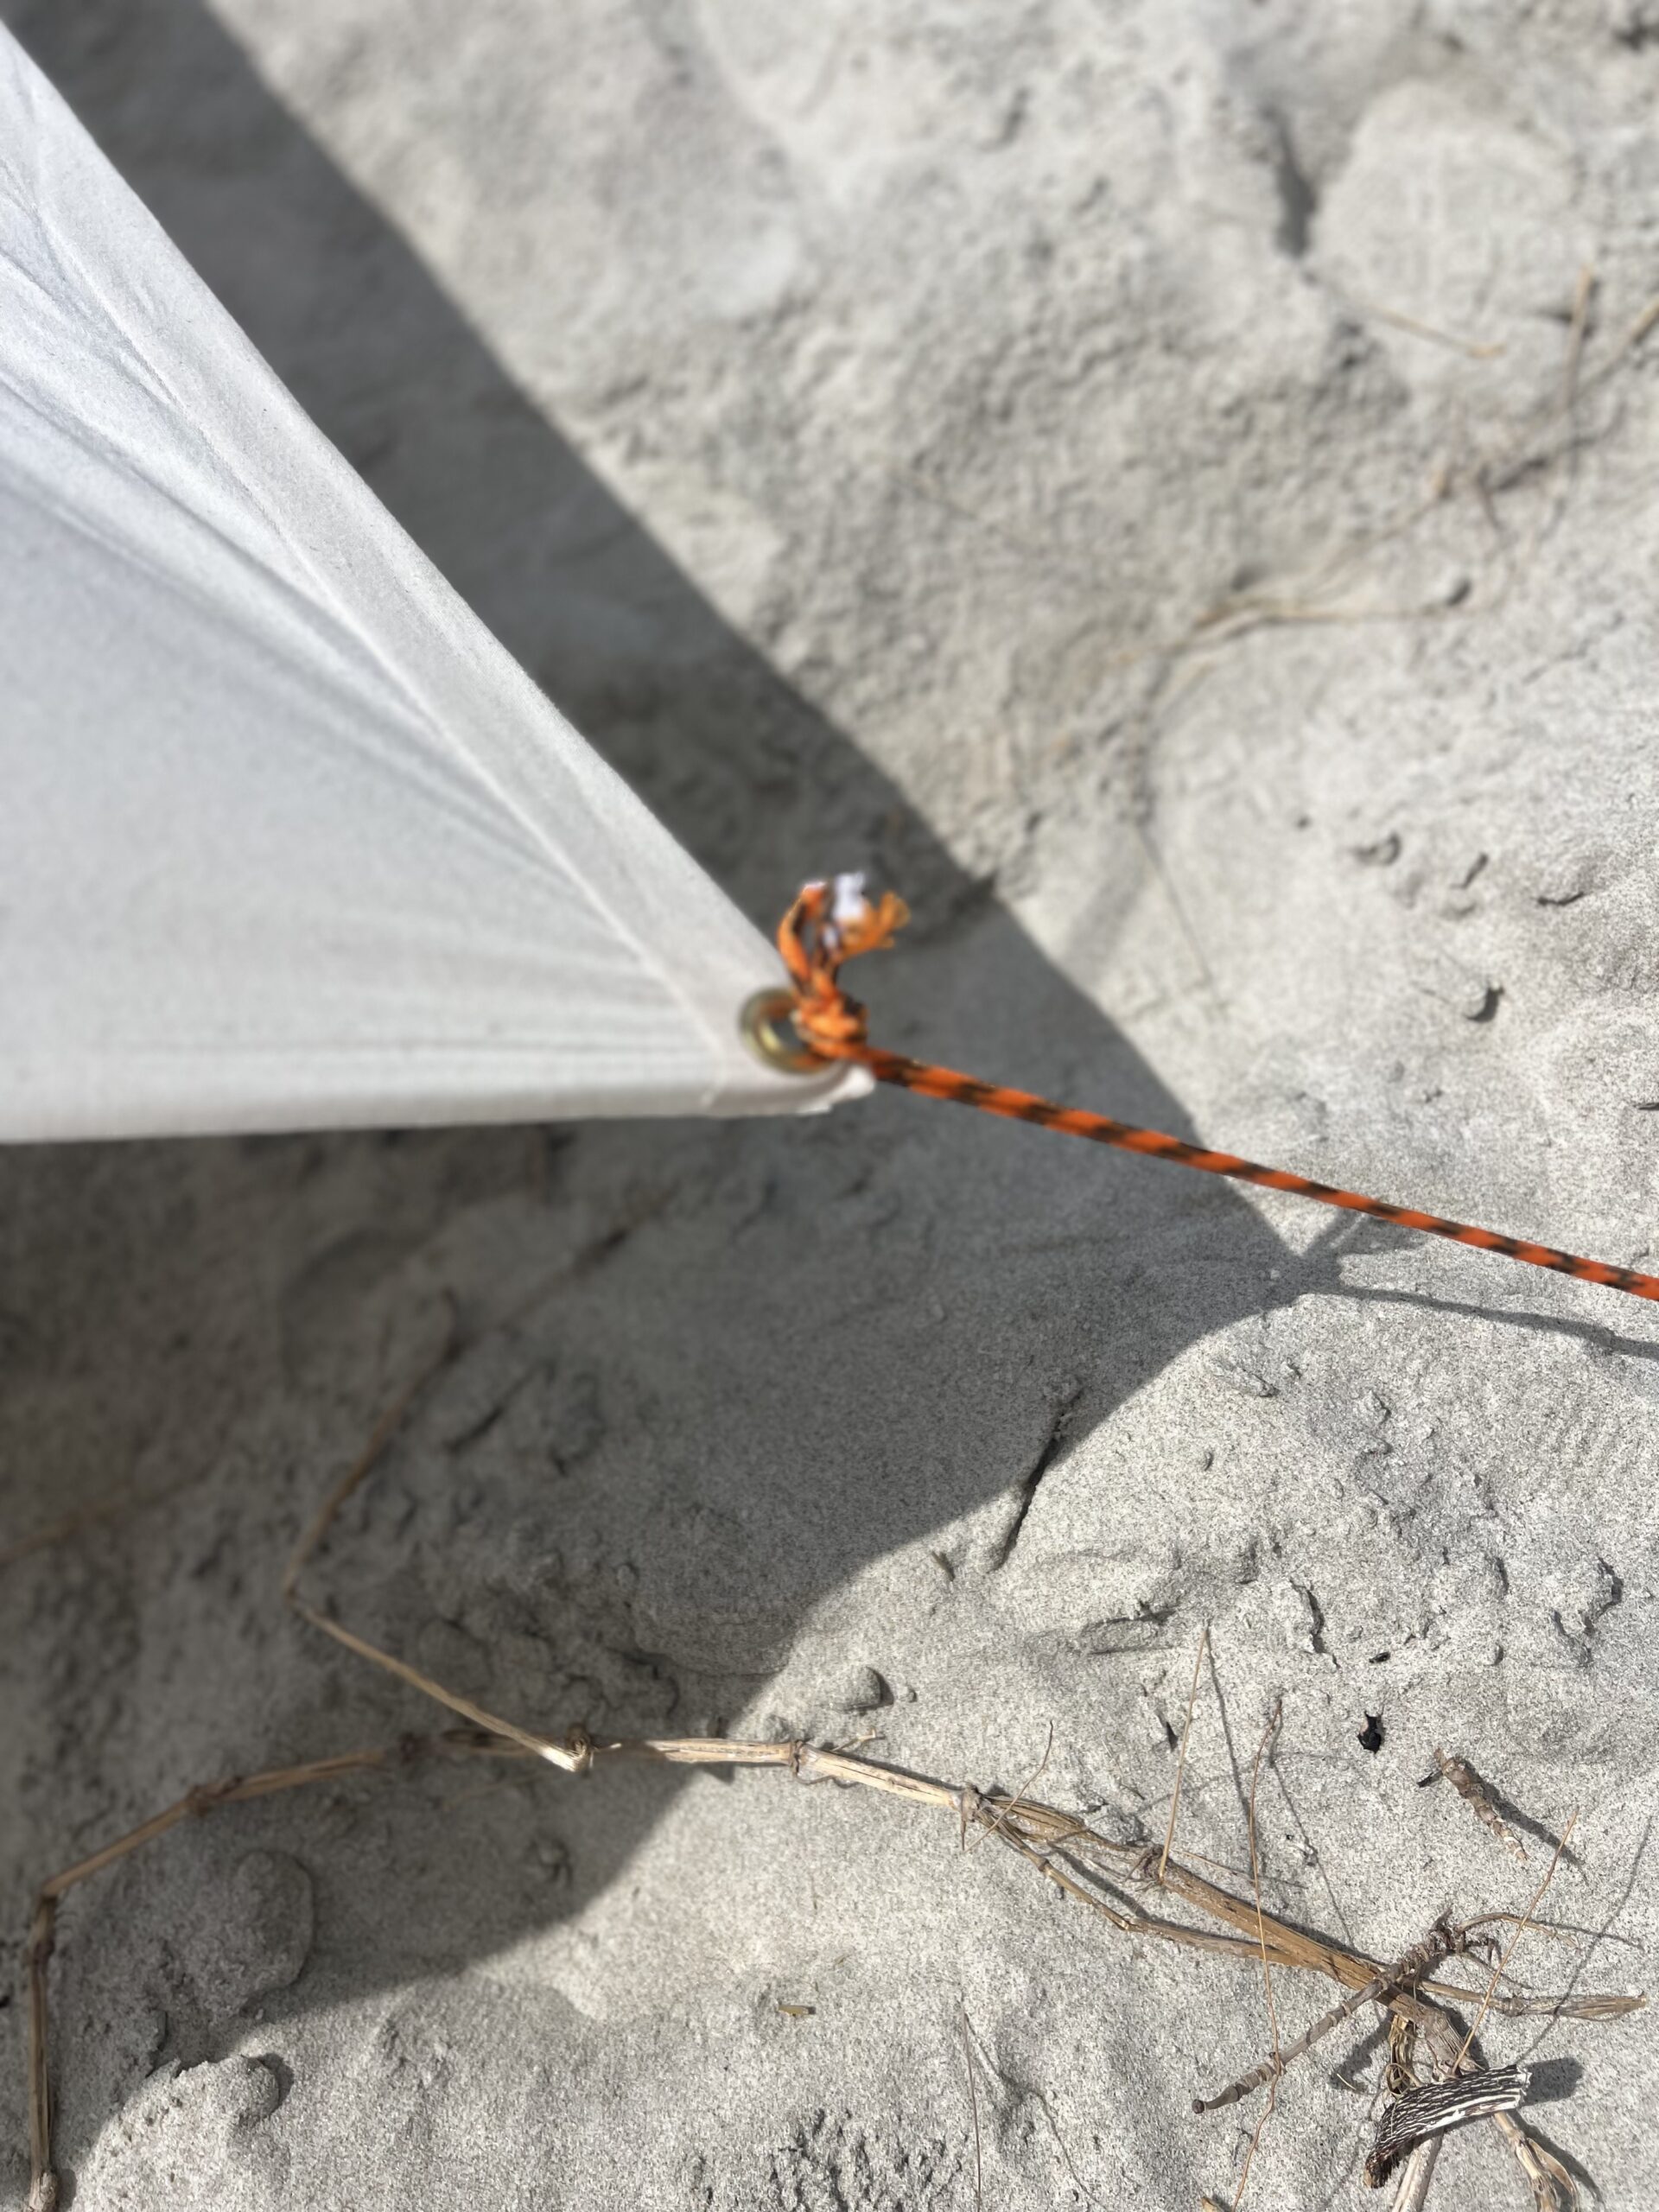
- 1 packet of large eyelets/grommets (these or bigger)
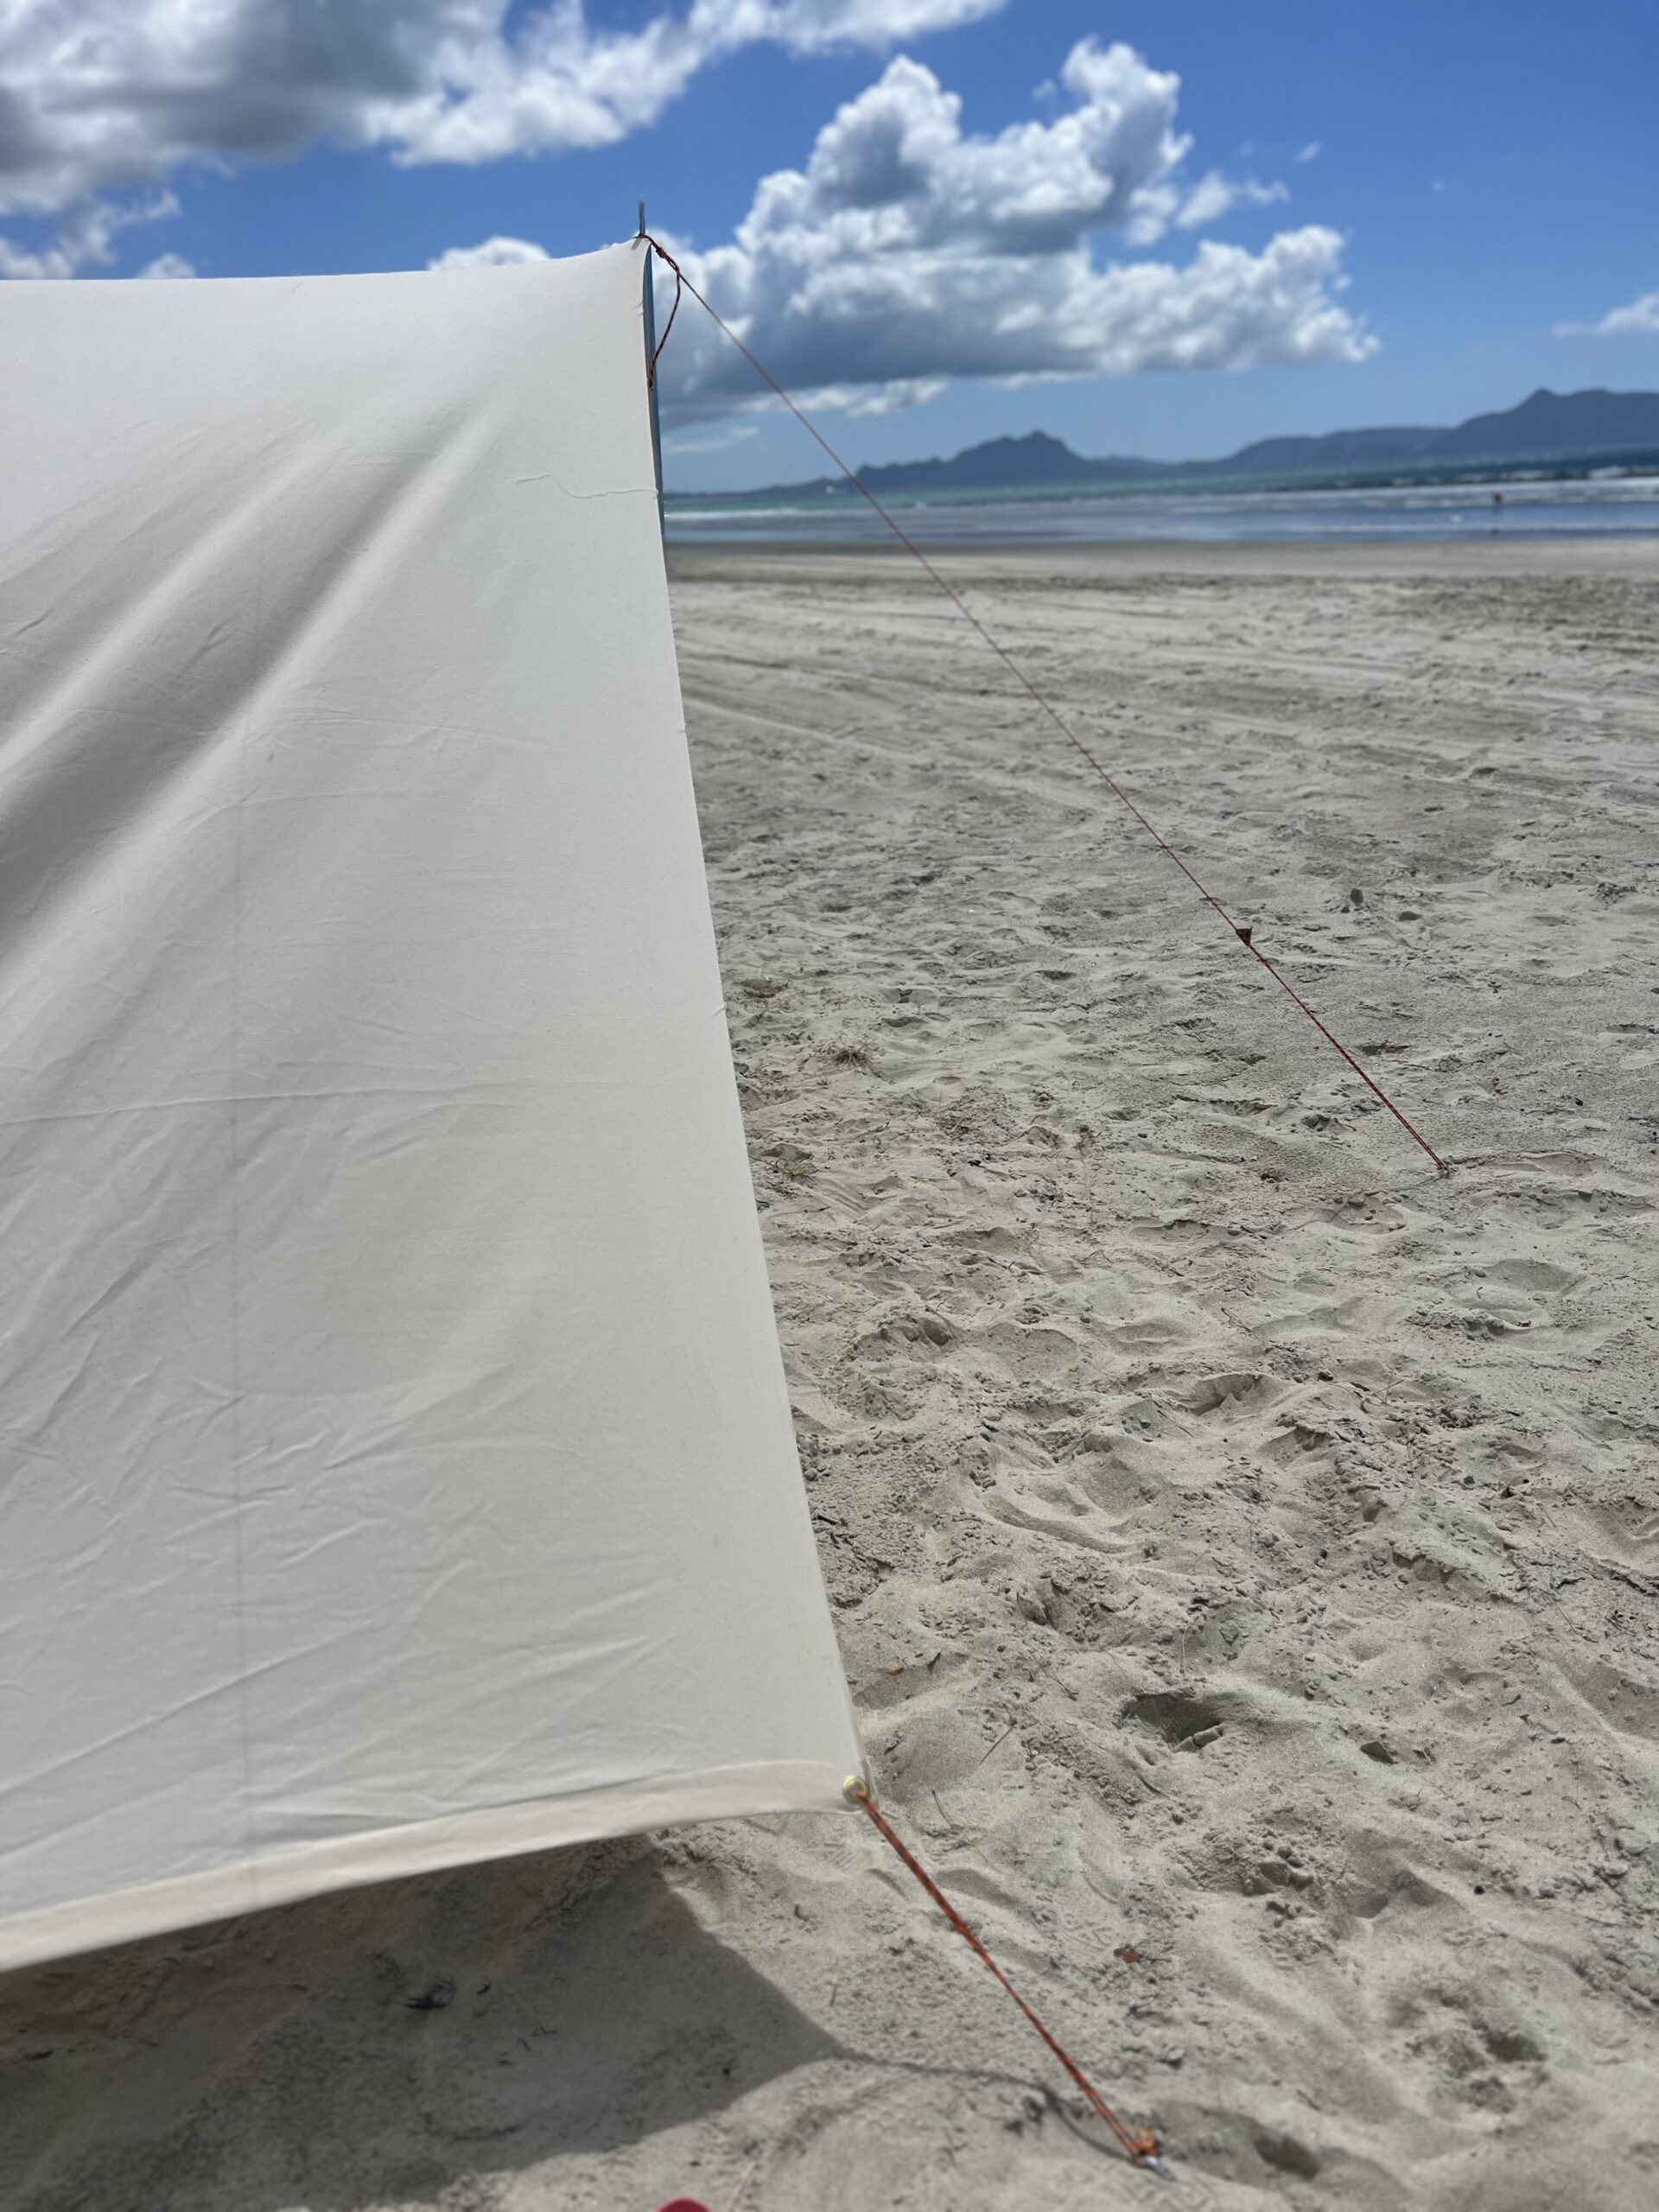
- 2 x Adjustable guy ropes plus 4 shorter pieces of rope for each corner (doesn’t have to be adjustable).
- 6 x tent pegs
- Thread
Storage & Peg Bags:
Instructions
Shelter:
1. Fold and press both raw ends of your calico/main fabric in 5cm, then fold and press again. Edgestitch in place.
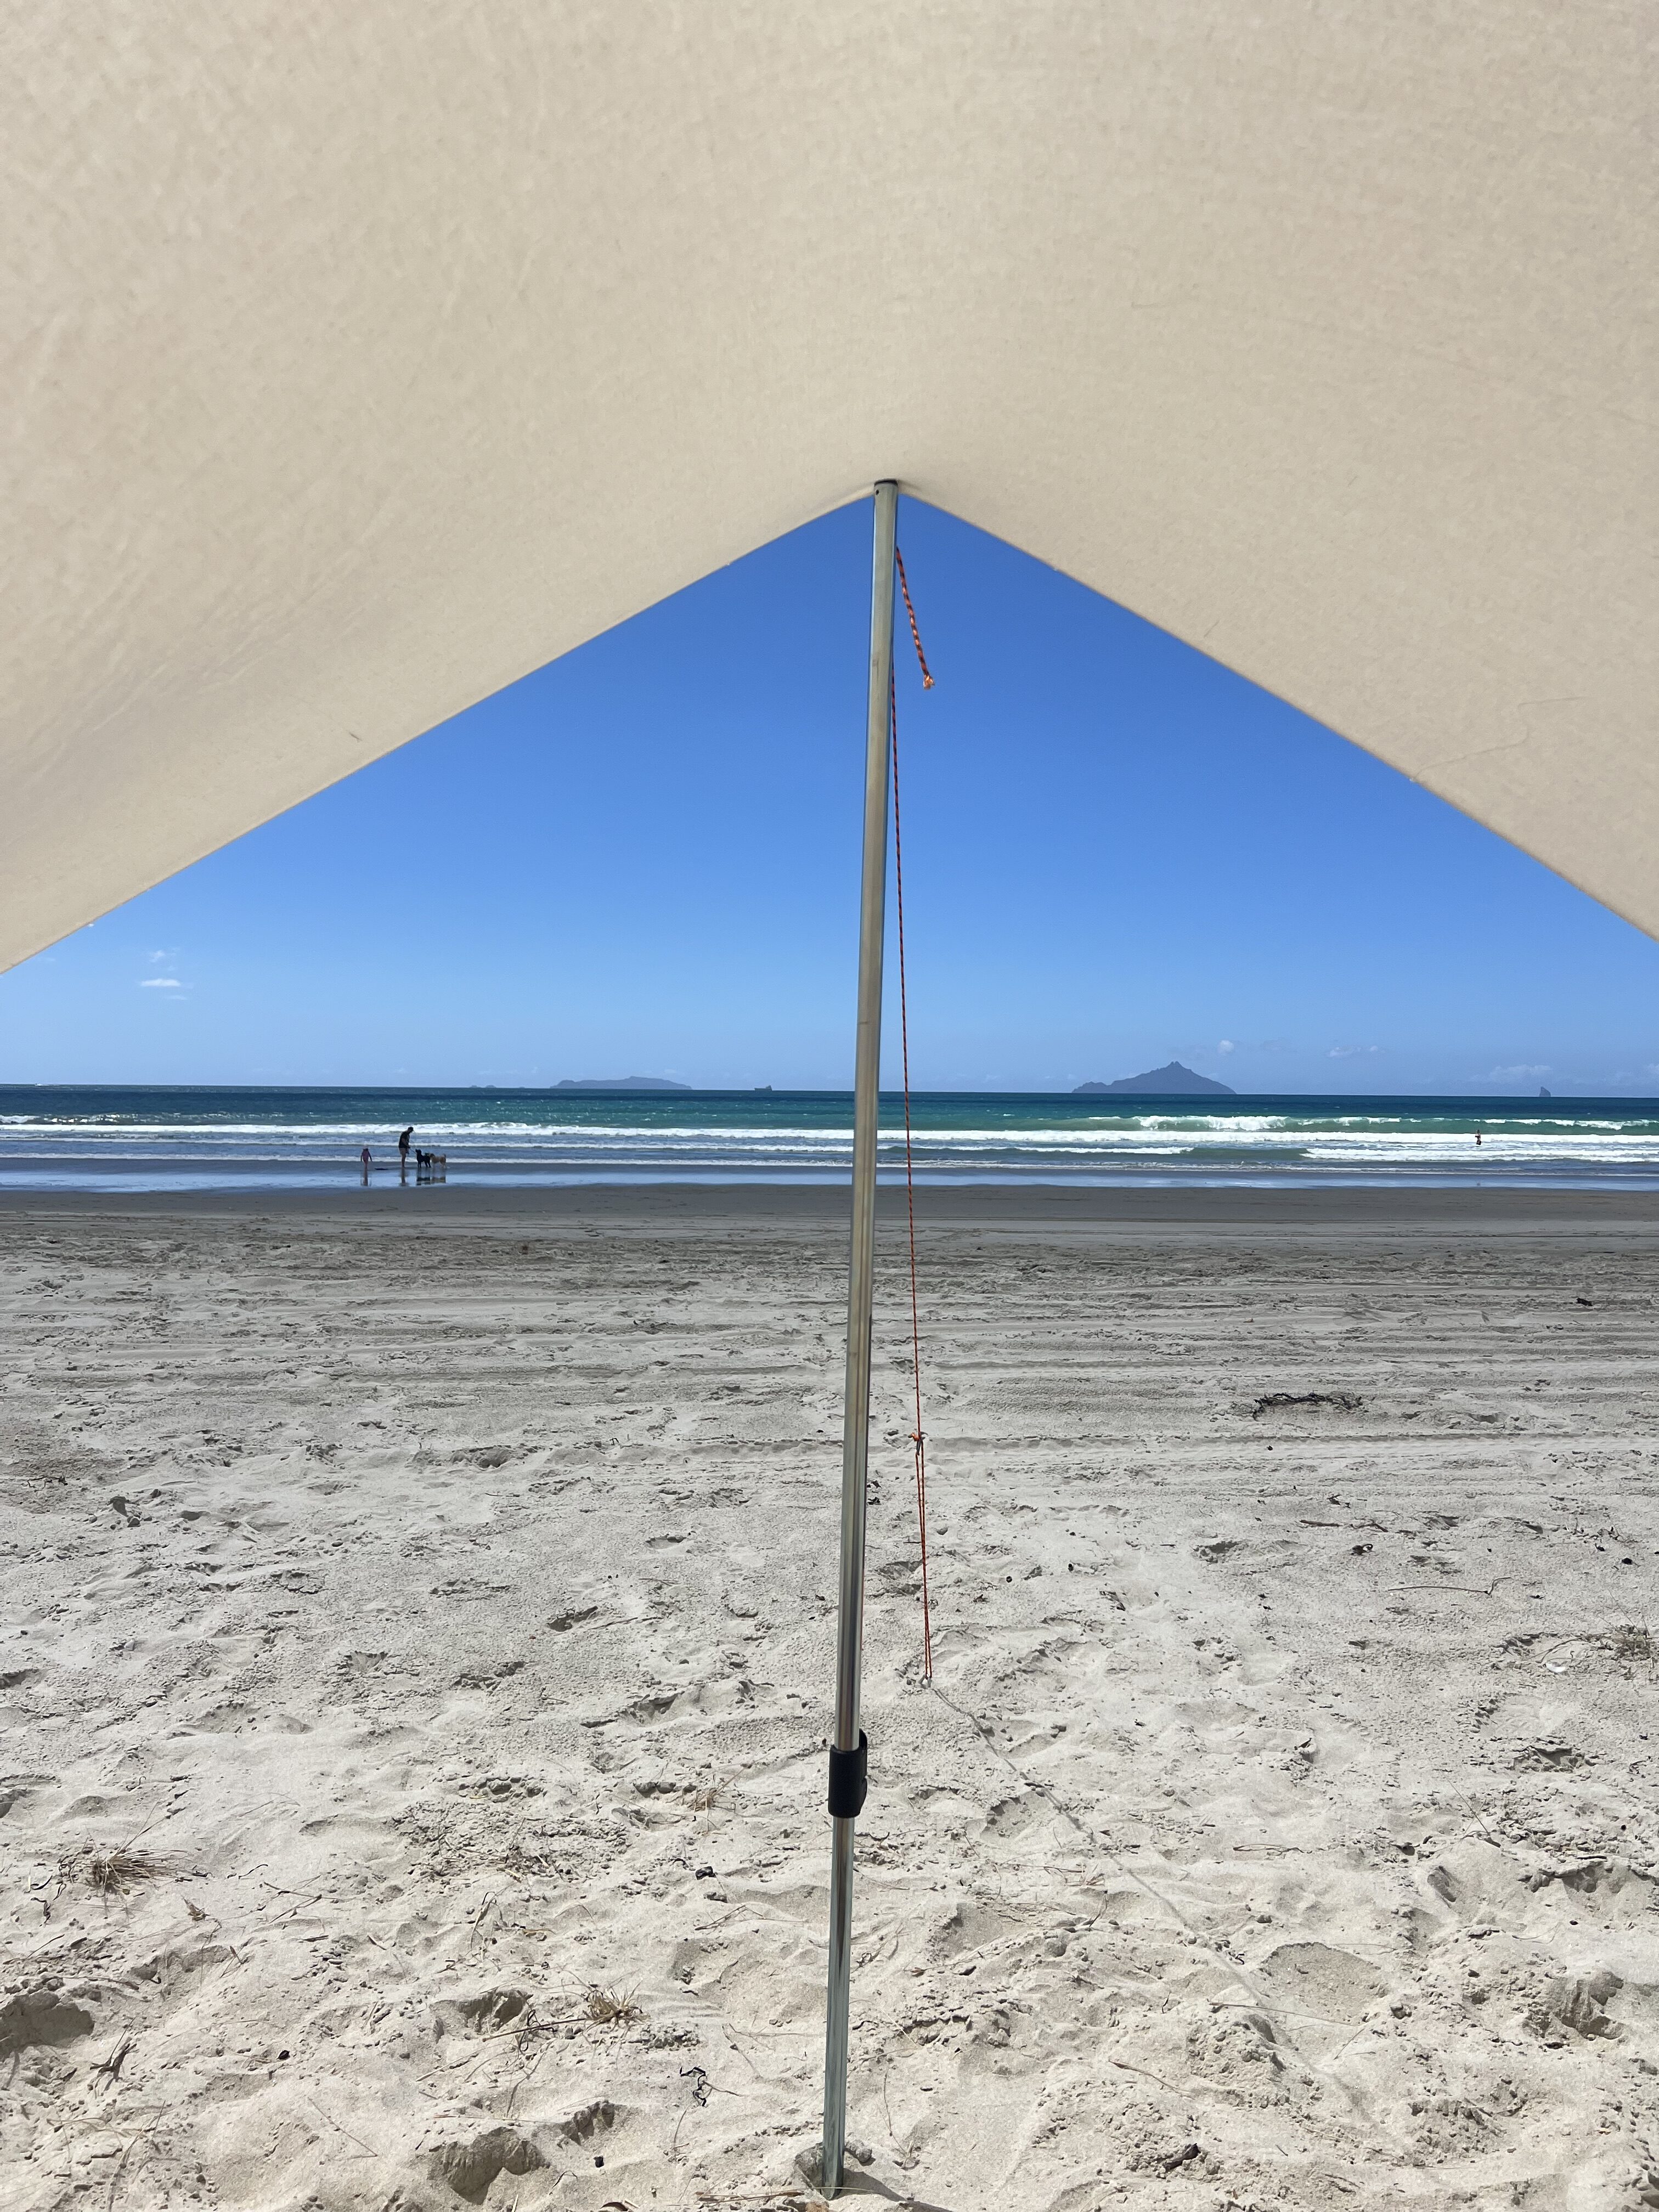
2. Install eyelets at all 4 corners following the instructions on the packet, being careful not to get too close to the edges.
3. Install eyelets near the selvedge on both sides at the halfway point i.e. 1.5m.
4. Tie the shorter lengths of rope (approx 40cm) to each corner eyelet
Take it outside, lay the shelter flattish/loosely on the ground and peg each corner into place. Insert poles into the central eyelets and extend to the right length to hold the shelter taut. Pop guy rope loops over the poles, peg the other end out and adjust until taut.
Done!
Storage Bag (optional!):
1. Measure a length of fabric as long as your poles (not extended) and add 20cm. Cut to a width of approximately 50cm.
2. Press the cut fabric in half lengthwise.
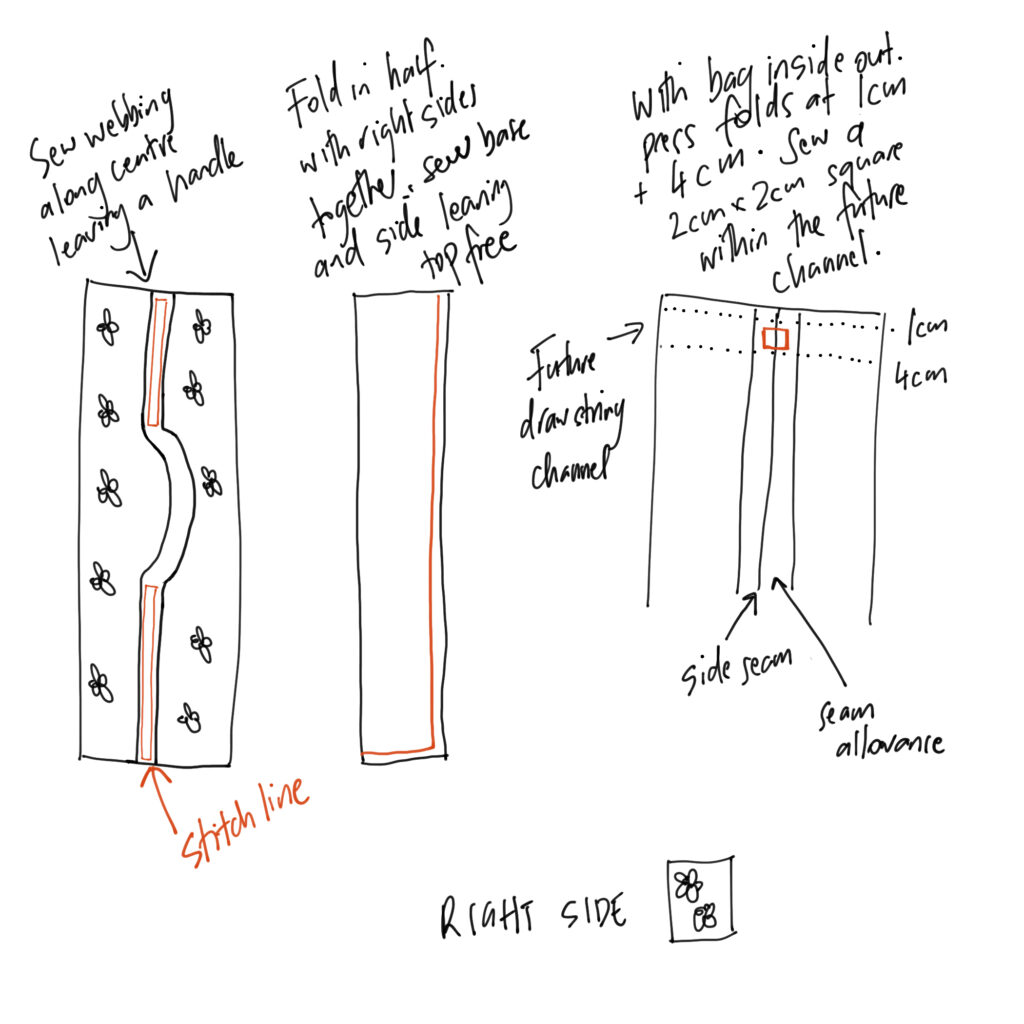
3. Lay fabric flat in front of you with the right side facing up and pin the webbing along the pressed crease starting at the base, leaving the central 40cm unpinned with enough slack/ease to use it as a handle. Pin the other side down, and edgesstitch around the webbing to secure it in place continuing around the corner and back the other side when you reach the centre.
4. Fold in half, lengthwise with the right sides together. Pin and sew edges together with a 1.5cm seam allowance continuing around the corner when you reach to the base. Leave the top open. Finish raw edges (or not) as you wish!
5. Leave bag inside out and either finish the raw edge of the opening with an overlocker/zigszag and turn down 4cm or fold and press raw edge 1cm in then 4cm to create the drawstring channel (don’t sew just yet).
6. Unfold the channel and mark out a square around the side seam within the borders of the channel (see diagram). The square should be approx 2cm . x2m.
7. Sew around the square twice, secure with a good backstitch.
8. Unpick the side seam stitching within the box you’ve just sewn. This will create an opening for you to thread the drawstring through.
9. Fold back into place using the crease marks you made previously. Stitch in place to create the drawstring channel.
10. Thread the drawstring cord through the opening you made and tie the end in a knot to secure.
Repeat for the peg bag for a cute matching set.
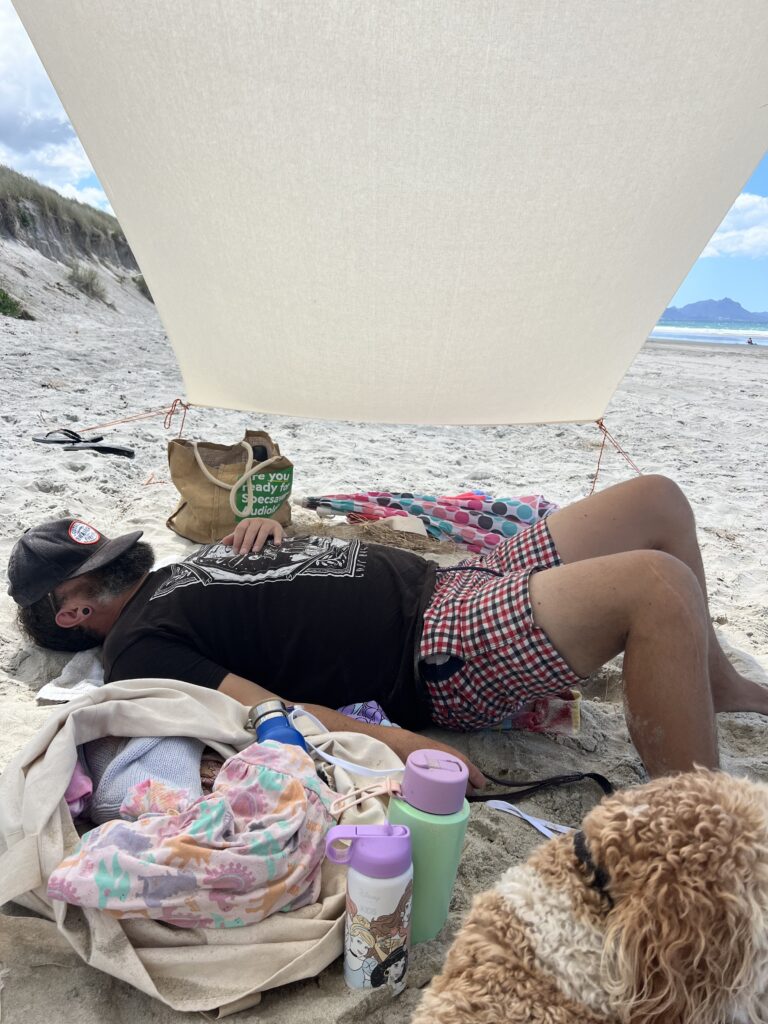
Now you can take it to the beach and relax like this guy! (Lucky he never looks at my website or I might receive a complaint for adding that one!)
Things I might add/change in the future:
- Buy 2 more poles to use at one end for times when we want more height.
- Double the width. I would sew two widths of fabric together using a flat felled seam for strength. Potentially this would require another centrally placed pole.